Level Up Your Note-Taking with LLMs
October 09, 2025

How to Crop and Optimize Images for the Web
Why is it important to optimize images on your website? Unreasonably large file sizes are a major contributor to slow load times. This affects usability, turns off site visitors who do not want to wait, and also affects how well a website ranks in search results. Studies have shown that nearly half of website visitors expect sites to load in 2 seconds or less, and they are apt to abandon sites that take longer to load. Equally important to note is that since 2010, page speed has been a factor in Googles ranking algorithm. Also, in 2018, Google made page speed a major factor for mobile searches.
While there are many elements that can affect a website’s ranking in search results, image file size is an easy one for anyone to manage. Ensuring that the images you are using on your website are optimized – meaning that the image file size has been reduced to the lowest possible size while still retaining quality – is a simple way to help improve your site loading time and be on good terms with Google.
Now, when we talk about image size, we mean the file size itself. The dimensions of the image however, whether it's 250 pixels or 2000 pixels, will contribute to the file size. The larger the file size, the longer it takes to load for site visitors.
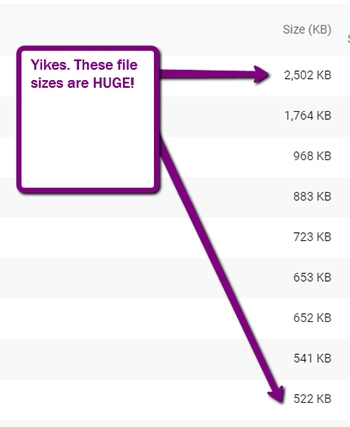
For example, here is a snapshot of a website tested in Page Speed Insights showing image file sizes that are very large. As noted, depending on the actual dimensions of your image the optimal file size will vary, but a good rule of thumb is to try to stay under 150kb or even 100kb if possible.
It’s unfortunately a very common thing to see websites that load slowly due to extra-large file sizes. So how do we fix it? We're going to use a simple online tool to optimize our images for the web!
In this tutorial video, I’m going to show you three things:
- How to reduce/adjust image dimensions.
- How to crop an image to get a defined set of dimensions.
- How to optimize the image, which compresses the file size and as such contributes to a faster loading website.
The tool we will use is a free, web-based application called Pixlr. In less than 5 minutes you’ll be optimizing images like a pro.
Getting started:
- Visit pixlr.com
- Click “Try Pixlr X”
- Click “Open Photo”
- Choose the image you need to optimize
Using the tools in the left sidebar you can:
- Resize – click the icon and then choose “Image”. You can adjust the dimensions to suit your needs.
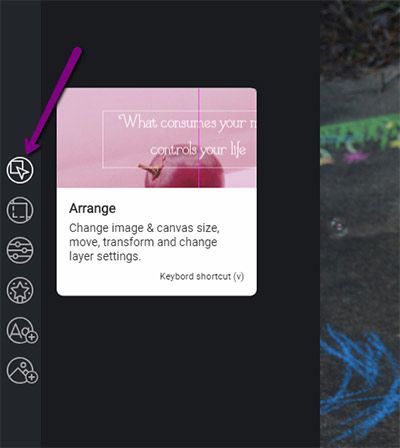
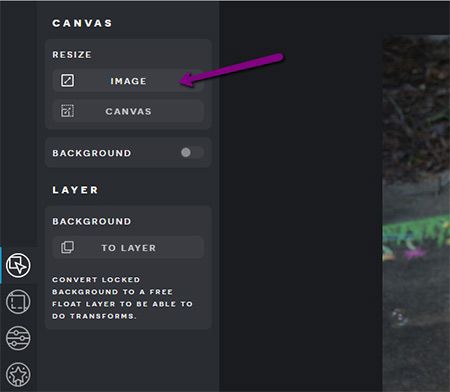
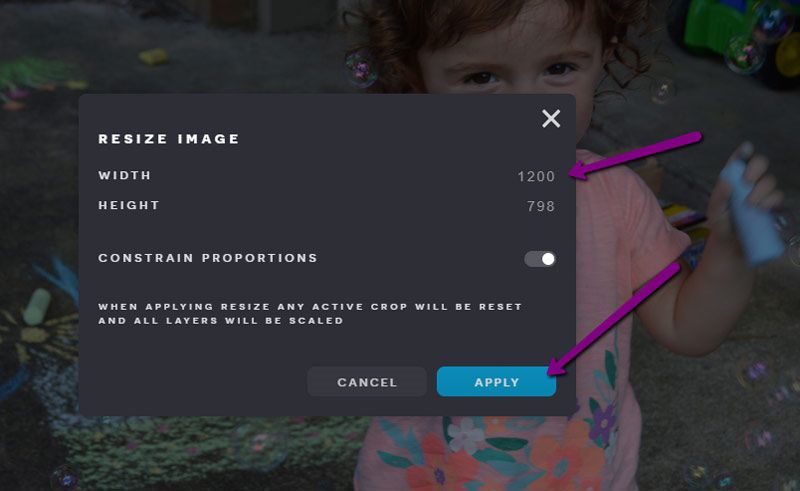
- Crop – Set the width and height you need the image to be, then drag the crop frame to contain the section of the image you would like to show. You can also freeform the crop by dragging the edges of the crop frame.
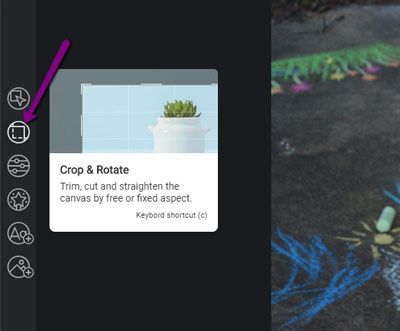
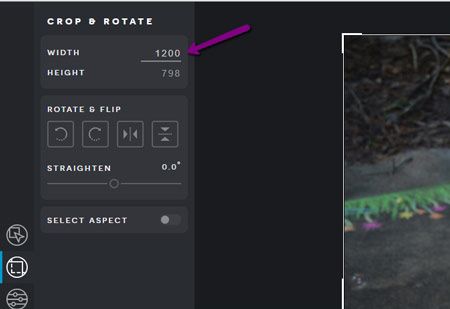
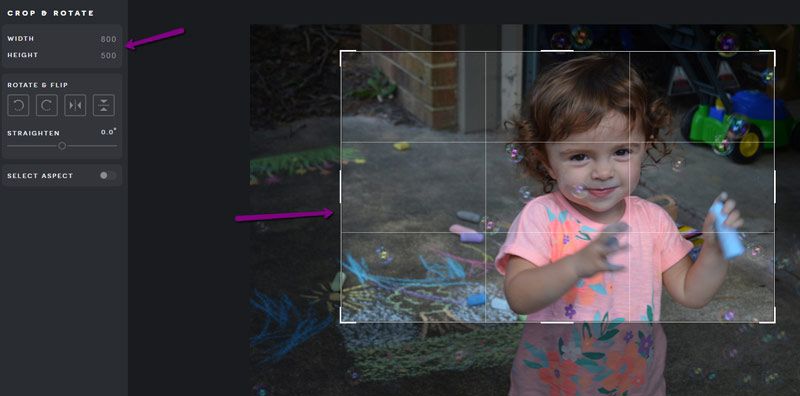
Once done, you are ready to save it.
- Click “Save” in the bottom right.
- Here you will adjust the quality of the image to a reasonable file size – under 150kb or less when possible - and still retain the quality.
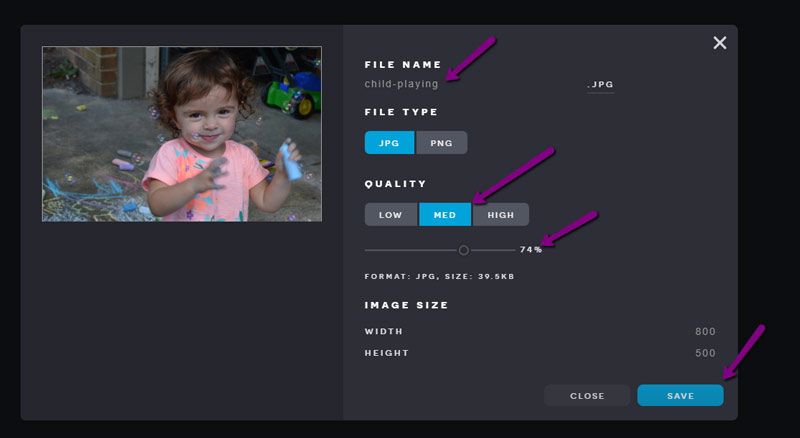
Now your image is ready to publish to the web. Do this for each image you publish on your site and you will be ahead of the game in keeping your website loading fast for your users and search engines alike.
